
Orchid Care
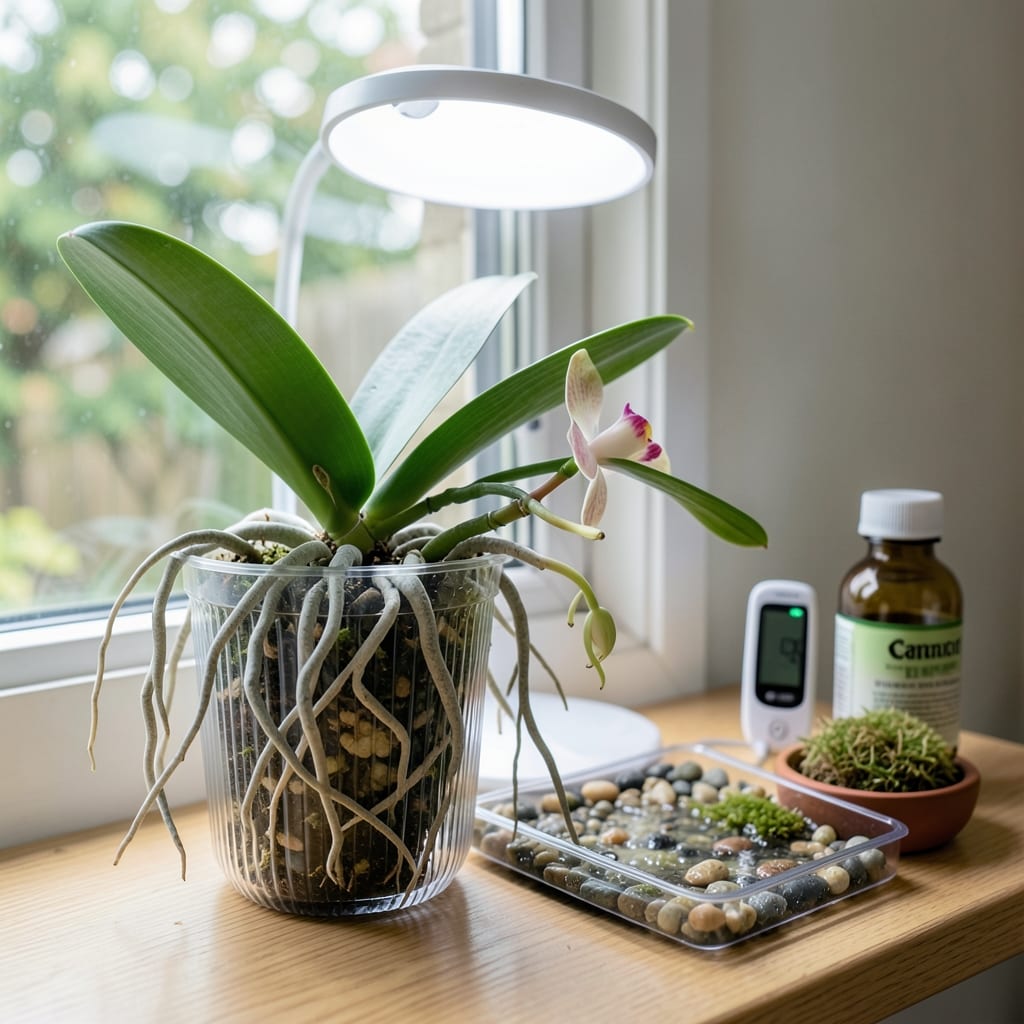
Ever stared at your orchid’s bare pot and wondered, "How long for orchid to grow new roots?" The answer isn’t just about time—it’s about unlocking the right conditions to coax those delicate roots back to life. Some varieties like Phalaenopsis might show signs of new growth in just 4-6 weeks, while others need 10-12 weeks of patience and precise care.
What if I told you the difference between slow and speedy root growth often comes down to something as simple as humidity levels or the right substrate? You’re not just waiting for roots—you’re nurturing an entire ecosystem. Let’s break down the timeline by orchid type and the small adjustments that make a big difference in how quickly those roots take hold.
From the moment you repot your 🌸 orchid to the first green shoot peeking through the bark, every detail matters. We’ll cover what to watch for (like those telltale silver-tipped roots) and how to troubleshoot when progress feels painfully slow. Ready to turn your orchid care from guesswork to science?
Whether you’re dealing with a post-division recovery or just curious about the growth process, this guide gives you the tools to accelerate root development—without overcomplicating things. Let’s get those roots growing!


Orchid root growth timeline: how long by variety and conditions
Understanding the orchid root growth timeline starts with recognizing that not all orchids follow the same schedule. For example, Phalaenopsis orchids—the classic "moth orchids"—often show new root growth in just 4-6 weeks under ideal conditions, while Cattleya orchids may take 8-12 weeks to regenerate roots after repotting. These differences aren’t random; they’re tied to the orchid’s natural growth habits and environmental needs.
The key to speeding up root growth lies in replicating the orchid’s native habitat. Most orchids thrive in humidity levels between 50-70%, warm temperatures (70-80°F), and bright, indirect light. When these conditions align, you’ll see faster root development. For instance, a Dendrobium orchid might take 6-8 weeks to grow new roots if given the right balance of light and airflow, whereas an Oncidium could stretch that timeline to 10-12 weeks if humidity drops below 50%.
Here’s the critical part: root growth isn’t linear. The first 2-3 weeks after repotting or division are often the slowest, as the orchid recovers from stress. After that, you’ll notice silver-tipped roots (a sign of new growth) emerging from the base of the plant or along the rhizome. These roots start off soft and white but gradually turn green or silvery-gray as they mature and absorb moisture.
Let’s break down the orchid root growth timeline by variety, so you know what to expect and how to adjust your care routine. The table below highlights the typical growth windows, ideal conditions, and what to watch for at each stage.
| Orchid Variety | Root Growth Timeline | Ideal Conditions | Key Growth Signs |
|---|---|---|---|
| Phalaenopsis | 4-6 weeks | 60-80°F, 50-70% humidity, bright indirect light | Silver-tipped roots, firm new growth |
| Cattleya | 8-12 weeks | 65-85°F, 40-60% humidity, moderate to bright light | Thick, woody roots, slower initial growth |
| Dendrobium | 6-8 weeks | 70-85°F, 40-50% humidity, high light tolerance | Long, wiry roots, rapid elongation |
| Oncidium | 10-12 weeks | 60-75°F, 60-70% humidity, bright indirect light | Clusters of fine roots, slower but steady growth |
The substrate you choose plays a huge role in how quickly roots establish themselves. Orchids like Phalaenopsis thrive in a mix of bark, sphagnum moss, and perlite, which allows roots to breathe and absorb moisture efficiently. On the other hand, Cattleyas prefer a chunkier mix with fir bark and charcoal to prevent rot. If your orchid’s roots are struggling, it might be time to repot into fresher substrate—this alone can cut root growth time by 2-3 weeks.
Another common misconception is that more water equals faster roots. In reality, orchids need a soak-and-dry cycle: water thoroughly until it drains from the bottom of the pot, then let it dry out slightly before watering again. Overwatering can lead to root rot, which halts growth entirely. Aim for 7-10 days between waterings in spring and summer, and stretch that to 14-21 days in winter when growth slows down.
Temperature fluctuations can also throw off your orchid’s root growth timeline. For example, Dendrobium orchids often enter a dormant phase in winter, where root growth nearly stops until temperatures rise again in spring. If you’re growing orchids indoors, place them near a heat source (like a sunny window) to maintain consistent warmth. Outdoor orchids benefit from a slight drop in nighttime temperatures (around 55-60°F), which can actually stimulate root growth.
Pay close attention to the color and texture of new roots. Healthy roots should be silvery-green or white and firm to the touch. If they appear mushy, black, or hollow, it’s a sign of rot or fungal infection, and you’ll need to adjust your care routine immediately. On the flip side, thick, woody roots (common in mature Cattleyas) indicate a well-established plant that’s ready for repotting or division.
Pro tip: Use a clear plastic pot for the first few weeks after repotting. This lets you monitor root growth without disturbing the plant. You’ll be amazed at how quickly those tiny silver tips turn into robust roots when given the right conditions. With patience and the right care, your orchid’s root system will be thriving in no time!
5 Care triggers to speed up orchid root growth naturally
If you’re eager to see those orchid roots sprout faster, focus on these 5 care triggers that act like natural growth accelerators. Many gardeners overlook simple adjustments—like humidity levels or substrate choices—that can shave weeks off the root growth timeline. For example, a Phalaenopsis orchid might take just 4-6 weeks to regrow roots when given the right conditions, compared to 10-12 weeks in less-than-ideal environments.
The first trigger is mastering the soak-and-dry watering method. Instead of keeping your orchid’s mix damp, soak the pot thoroughly until water drains from the bottom, then let it dry out for 3-5 days before repeating. This mimics their natural epiphytic habitat and prevents root rot, which stalls growth. Pair this with lukewarm water to avoid shocking the roots—cold water can delay regrowth for weeks.
Don’t underestimate the power of humidity. Orchids thrive in environments with 50-70% humidity, which is far higher than most homes. If your air feels dry, place the pot on a tray of pebbles and water (ensure the pot isn’t sitting in water) or use a small humidifier nearby. A hygrometer is worth the investment—low humidity can delay root growth by 3-4 weeks or more.
Your choice of substrate also plays a critical role. While many gardeners default to generic potting mix, orchids need well-draining media like fir bark or sphagnum moss. These materials allow roots to breathe and dry quickly, preventing rot. If you’re repotting, avoid coconut coir unless it’s blended with bark—it holds too much moisture and can suffocate roots.
Finally, fertilizer timing makes a surprising difference. During active growth (spring and summer), apply a balanced orchid fertilizer at half-strength every 2 weeks. The key word here is “balanced”—too much nitrogen speeds up foliage growth at the expense of roots. In fall and winter, skip fertilizing entirely, as orchids enter a dormant phase where growth slows naturally.
By tweaking these five factors, you’ll create an environment where your orchid’s roots can focus on regrowth instead of struggling. The results? Faster recovery after repotting, stronger roots, and more frequent blooms. Just remember: consistency is key—orchids respond best to steady conditions rather than sporadic changes.